One of the first tasks when getting started with HubSpot is setting your logo as part of the branding settings of your website pages. This can be achieved simply by navigating to Settings > Website > Pages from the left navigation, and then clicking on the Branding tab. This is an important step as most modules, themes, or HubSpot's native options and settings make use of this file defined here.
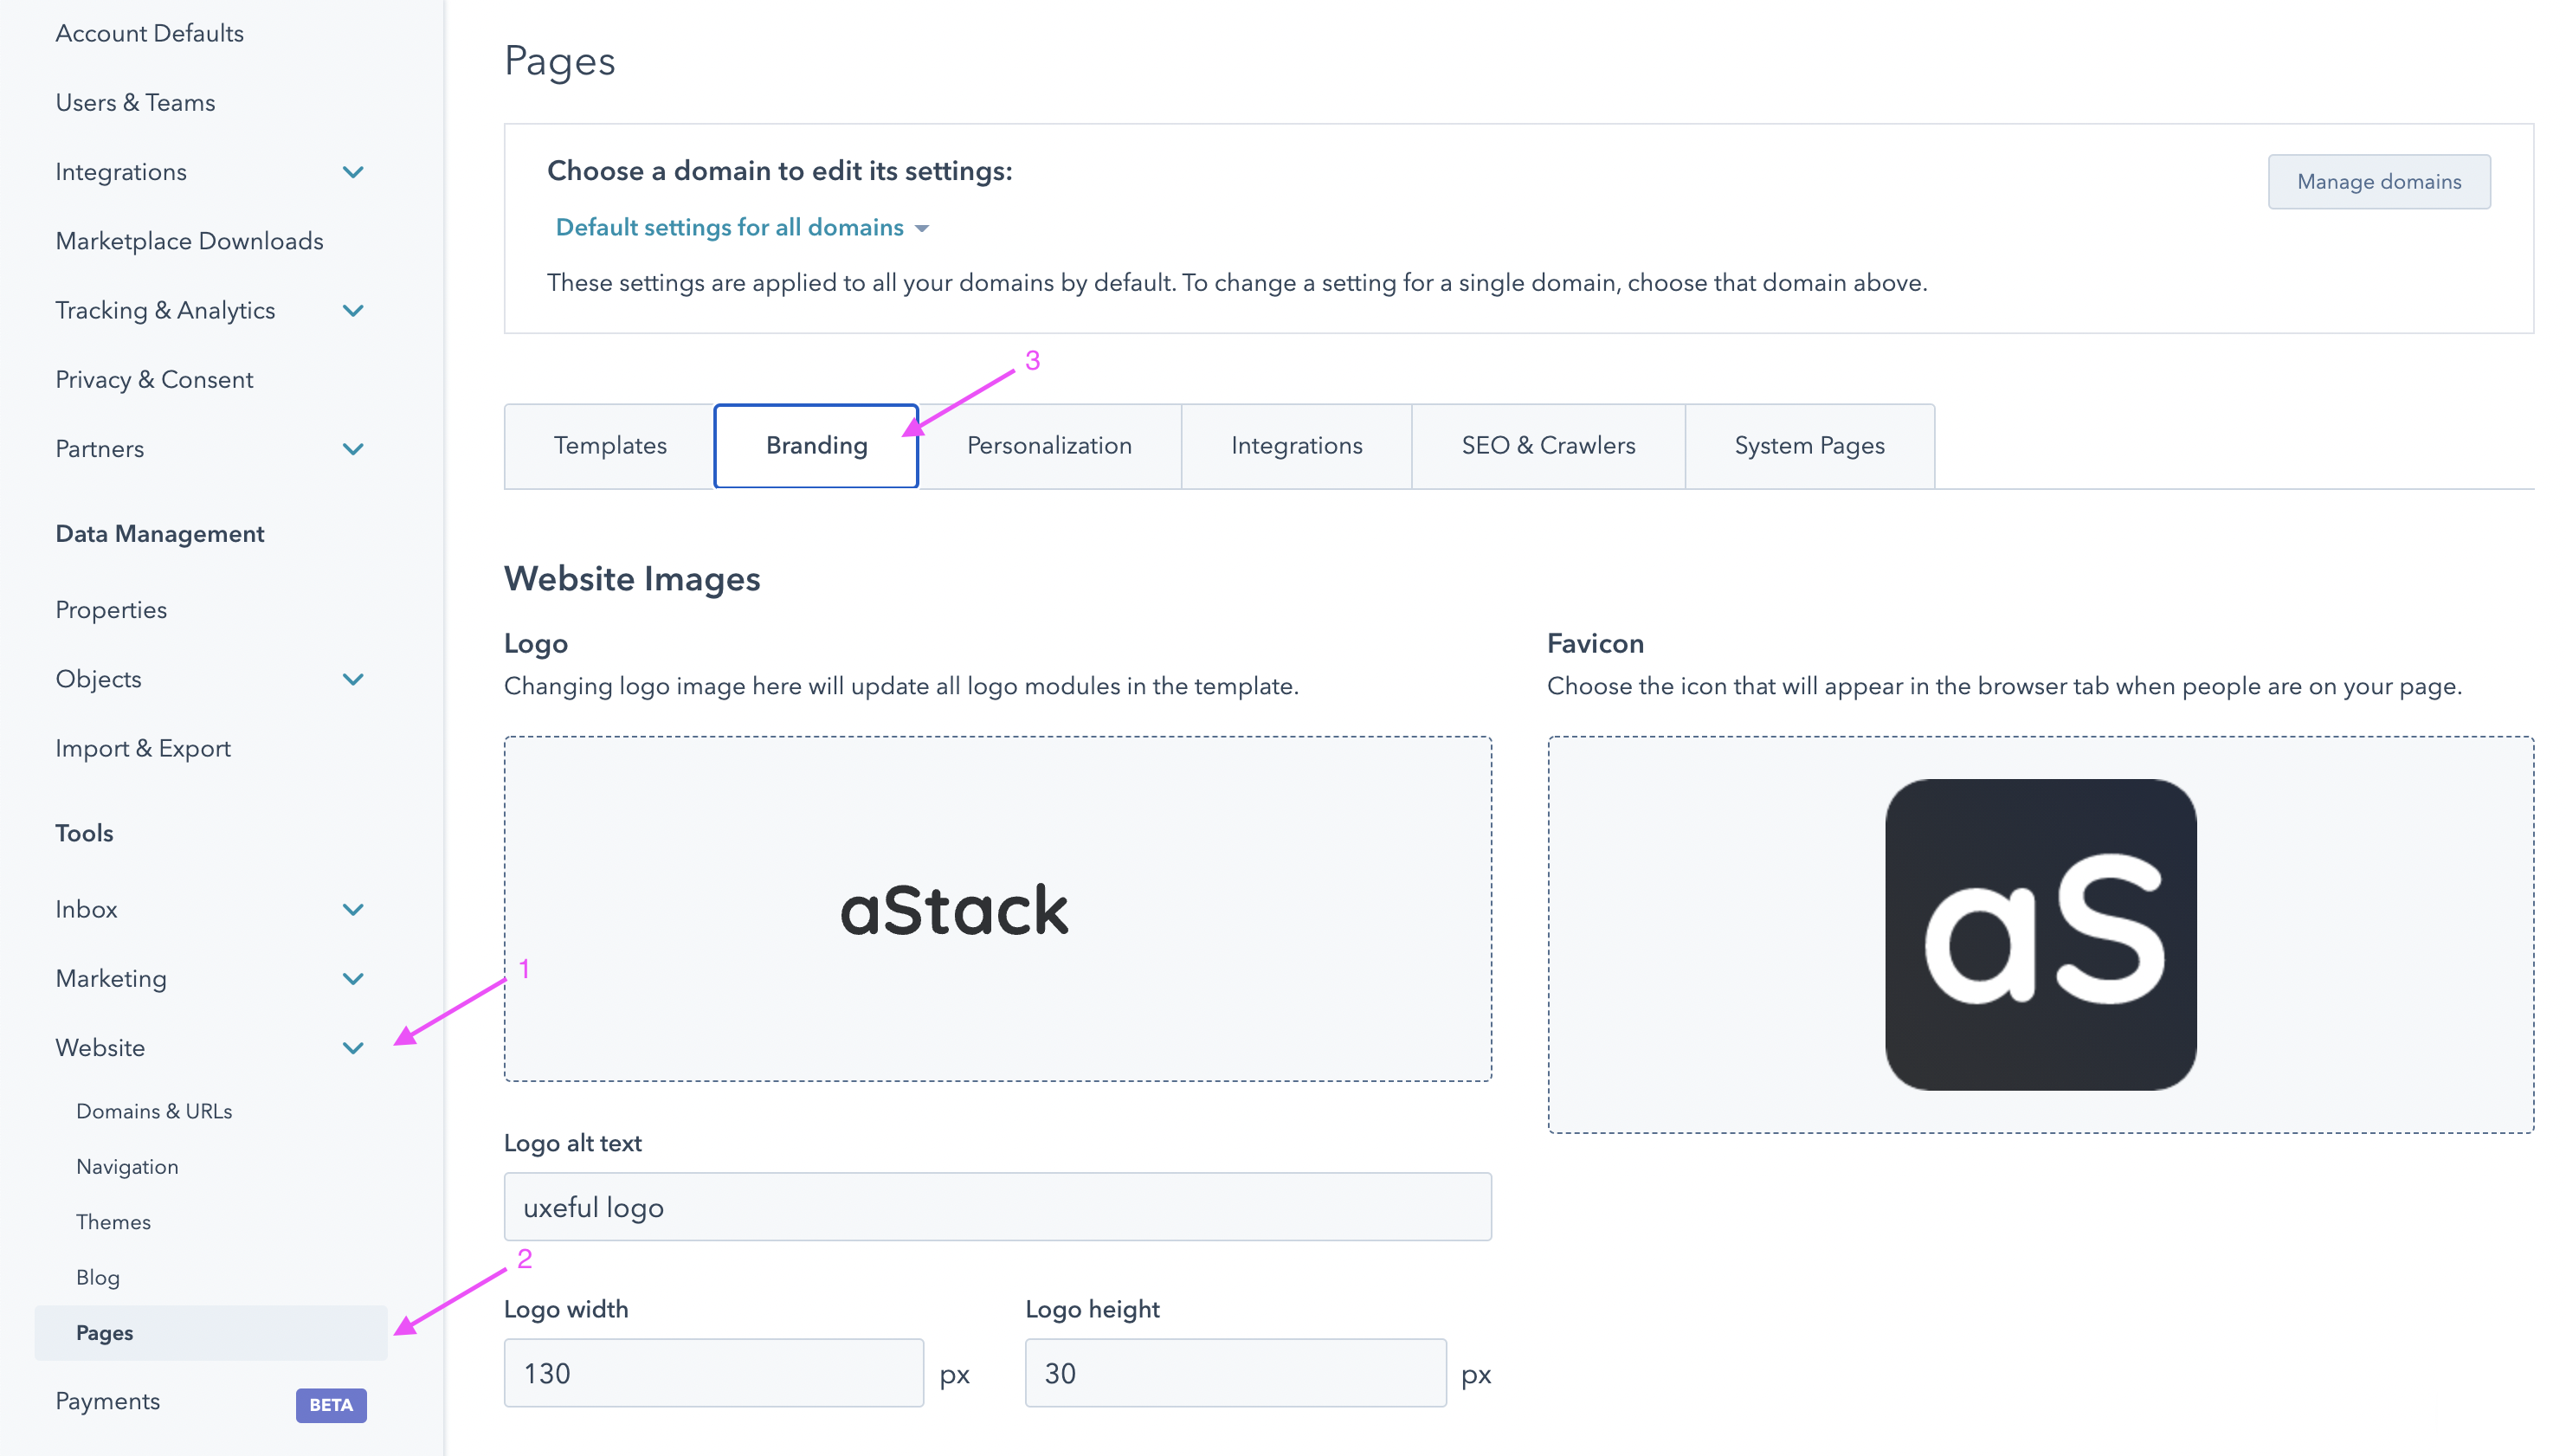
Please note that these settings can be adjusted for all domains, or for each individual domain in case you have multiple ones configured. Make sure you double-check this selection to ensure you're changing the right logo to have an immediate effect on your input.
How to Use HubSpot's Default Logo Module
HubSpot's default logo module comes packed with a set of comprehensive options which make it a great choice for template builders and the WYSIWYG editor at the same time. By default, it picks up the default logo you defined in your website's settings (see above) but also gives you the option to override the logo on a case-by-case basis, by toggling the "Override default logo on this page" option. When this is enabled, you can either upload or choose an existing image uploaded to HubSpot's file system.
Changing the Logo in the aStack Theme Menu
aStack theme comes bundled with a Menu module, which is included as part of most Website and Landing Page templates. This is a global module and - once edited - it will apply across your entire website. aStack's Menu module makes use of HubSpot's default logo module, so it inherits its options as outlined above. The only exception is that - if you click to toggle the "Override default logo on this page" option - this new logo that overrides the default one will be used throughout all the pages that make use of the global menu. If you then need to adjust the logo on a single page instance, read on.
![]()
Once you make any changes to the Menu (or any other global module) don't forget to publish the changes by hitting that top-right orange button. If you don't, your changes are only going to be saved, but they won't affect any pages making use of the global module until your changes are published.
Changing Your Logo on a Single Page
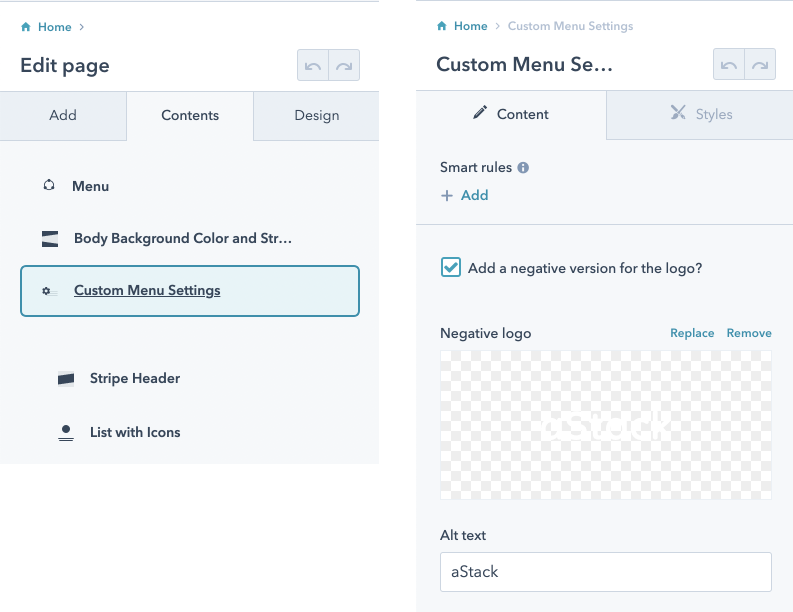
With aStack's smart module structure, you can override the default logo on specific website or landing pages. You generally want that when using a high-contrast color scheme and/or you need your negative version of the logo used. Other examples may include a co-branding you do as part of a one-off promo, etc.
To change the logo on individual pages you should use aStack's "Custom Menu Settings" module. When editing this module's options on any page, these changes will be in effect only on that page - as an exception - as you choose to override the menu's default settings, like in the example below: